My Backyard Garden Grape Wine Recipe and Method

Ingredients
- 20 L of grape juice (100lbs of crushed and destemmed grapes)
- 1 packet of wine yeast (this is what you need to start a yeast colony for up to 5 gallons of wine, even if you are making less!)
- Yeast nutrient (1 tsp./ gallon)
- Sugar
- Campden tablets (10)
Equipment
- Five+ gallon bucket
- Carboy
- Airlock
- Big long spoon
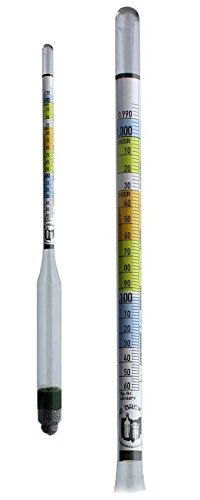
- Hydrometer
- Siphon hose
- 24 wine bottles bottles
- Corks
- Corker
- Sanitizing solution (I use Aseptox)
- Mask
- *A friendly relationship with a local brewing store. I'd like to send hugs to Von Euw Brew for equipment and advice. All my equipment images do have Amazon links, but honestly, you'll save money and build great relationships if you shop local!
Method
Sanitize
Fill a tub up with your sanitizing solution and immerse all equipment needed. Rinse well with hot water. Do this before each step.
Prepare Fruit/Sterilize Must
Destem and crush grapes to release juice. Fill your 5-gallon bucket. It's OK to leave the skins in the juice if you've got the room. This juice/skin mixture is called must.
Put on a dust mask.
Crush up 5 Campden tablets and mix into juice. Wear your mask because the powder and the gas that is released during this process is a respiratory irritant (it can chemically burn the back of your throat). However, the Campden tablets kill off wild yeasts and bacteria, making the fermentation process safer for an amateur like me.
Mix.
Allow the must to rest for 24 hours. Cover your bucket with a loose lid or a clean towel to prevent flies from getting in but allowing carbon dioxide to escape.
Adjust Sugar Levels
(to determine the alcohol level of your finished wine)
Check the sugar levels of your must with a hydrometer. The amount of sugar in your must will translate to how much alcohol there is in your finished wine. Drop the hydrometer into your must. The hydrometer will show you how much sugar is in the juice mixture by the way it floats. The higher it bobs, the more sugar there is in the must. This unit of measurement is called Specific Gravity (SG).
The sugar in your wine is digested by the yeast and converted to alcohol through the wine-making process. Your wine is finished when the hydrometer sinks deep into the wine and measures a low SG level of 0.99
To increase the Specific Gravity of your grape must, I just read that 1.5 cups of sugar added to 5 gallons increases the Specific Gravity .005 units. Honestly, I just make a generous batch of sugar water and added it slowly, mixing the sugar in and measuring the must with my hydrometer as I go. Be sure to completely dissolve your sugar in warm water before adding it to the must.
To lower the Specific Gravity, add water.
***Too much sugar can be a problem. You should look for a reading between 1.07 and 1.09 units of Specific Gravity. This will give you a wine between 10 and 13 percent alcohol. If you add too much sugar, the yeast will stop fermenting before the wine is finished.
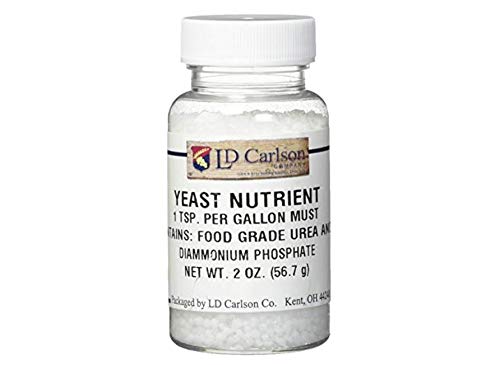
Add Yeast Nutrient
Once you're happy with the amount of sugar in your grape must add some yeast nutrient by stirring it directly into the must until completely dissolved. Yeast nutrients are a mix of yummy minerals and vitamins to feed and boost your yeast colony. Add
1 teaspoon per gallon.
Yeast Nutrient can also be added later to wine for stuck fermentation if your growing colony stops fermenting.

Add Yeast
Sprinkle 1 packet of yeast over the surface of the must. Don't stir.
Primary Fermentation
Cover the bucket with a loose lid or towel. Now sit back and watch your new yeast colony grow across the top of the wine.
After about 12 hours, you'll see a heavy, frothy cap form over the juice.
Stir (punch down) this cap into the must whenever the cap forms (every 12 to 24 hours).
You also need to keep your fermenting grape must in a place where the temperature is around 21 degrees Celsius.
After 5 days, take a reading with your hydrometer. Primary fermentation is complete when your hydrometer reads about 1.03 Specific Gravity.
Even if fermentation isn't done, don't leave the wine to sit any longer than 7 days. Otherwise, your new wine may start to develop some "off" flavours from the decaying grape skins/fruit sediment.

Siphon Wine into a Carboy

Now it's time to transfer your new wine from the bucket and into a carboy. A carboy is shaped like a giant wine bottle and is made from glass or plastic. Sterilize everything the wine will touch. This process of siphoning wine from one container to another is called "racking off."
How to siphon 😉
Take the vessel containing the wine with the sediment, open it up, and then place it up on a raised surface. The process involves gravity, so the full container of wine must be higher than the tallest portion of the clean bucket/carboy/bottle you're going to use to catch the wine.
Insert the siphon hose into your wine bucket, making sure to not touch the sediment lying on the bottom. You should be able to clearly see the line of sediment by the time you're ready to rack the wine.
Start sucking on the other end of the tube as if you're drinking from a straw until the wine begins to flow. Then move the tube into your sanitized carboy/bottle/bucket as quickly as possible. Try not to let the wine splash around too much. You want to try to minimize the amount of oxygen that mixes with your wine.
Keep a close eye on the sediment, making sure you don't stir it up. Once your container becomes full, or sediment begins to flow, clamp the hose to halt the wine's flow.
Toss the grape skins and sediment from primary fermentation in your compost.
 *Bonus step: Sample your homemade brew of Federweisser
Your wine is at this point sweet, frizzy and contains about 9% alcohol. Federweisser is a special treat because, due to the amount of C02 still being produced, it's impossible to bottle.
But be careful! I've heard this drink referred to as "Witch's Brew," and for a good reason! Federweisser is sweet and fun, and the lightness makes it easy to drink, but be sure to sip it slowly and moderately. Otherwise, the carbon dioxide/high alcohol content sets even a high-tolerance drinker up for a murder hangover. It can also be a little rough on the stomach.
You've been warned!

Seal off your wine with an airlock.
An airlock has a valve that stops oxygen from getting into the wine but allows carbon dioxide to escape. Watching the small C02 bubbles form and burst in the airlock can also give you a clue about whether your wine is still fermenting or not.
Secondary Fermentation
Let your wine ferment dry 0.99 and 0.98 on your Specific Gravity Scale. This step takes a couple weeks.
It's essential to keep an eye on the temperature of the room. If the wine gets too cold, the yeast will stop fermenting the sugar. If the room is too hot, you may pick up some strange flavours.
 Sweeten to taste (if you want!)
This step is called back-sweetening.
Rack (siphon) your wine back into your big bucket and add potassium sorbate (1/2 tsp. per gallon). Potassium Sorbate stops the yeast from multiplying again once you add sugar back into the wine.
Make a simple syrup by boiling 1 cup of water with 2 cups of sugar and cool. Set some wine aside to taste test what percentage of syrup you want to add to the wine (ex. 1-4%).
Be conservative when adding sugar to the batch. Wine sweetness builds up after several glasses.
Add your desired amount of sugar into the wine and mix well.
Sterilize Wine
Crush up 5 more Campden tablets and mix them into your wine. Don't forget to wear a mask! This will preserve and sterilize your finished product.
Settle for clarification
Rack your wine back into a sterilized carboy and pop the airlock back on. Now leave the wine alone for at least ten more days to allow the last wine sediment/dead yeast cells to fall to the bottom.
Once you're happy with the clarity of your wine, get ready to bottle!
Bottle
Make sure you have about 24 sterilized wine bottles, 30 new corks, and a sturdy corker.
I recommend calling around and renting a wine floor corker from a brewing supply store. These corkers make the process fast and easy. They are also heavy-duty enough that you don't need to mess around with soaking the corks or anything. Just pop the corks in the top compressor and pull the handle.
Siphon your wine into bottles to the base of the wine bottle neck.
Cork
Slap on silly labels.
Voila! Homemade wine!

Comments: Wine techniques and recipes vary a lot. No, it's not organic. No, it's not wild yeast. No, it's not a premium variety. 😂 I put this method down because it's what I wish I had when I began: a simple method to build from.
It is, however, your responsibility to determine the value and safety of the preparation instructions. I do not assume any liability for adverse reactions to food consumed. Recipes taken from this blog and prepared are done so “at your own risk.” You should seek advice before beginning if you are unsure of the recipe or your skills.
With love,
Charity